Onboard a New User
User management lets you add team members and control which data and modules they can access. A new user is created from the Settings Zone and is scoped to a single entity.
Create a new user
1. Open the user creation form
- Click the Settings icon in the left sidebar.
- Go to Users Settings.
- Click Onboard New User.
2. Enter the user's details
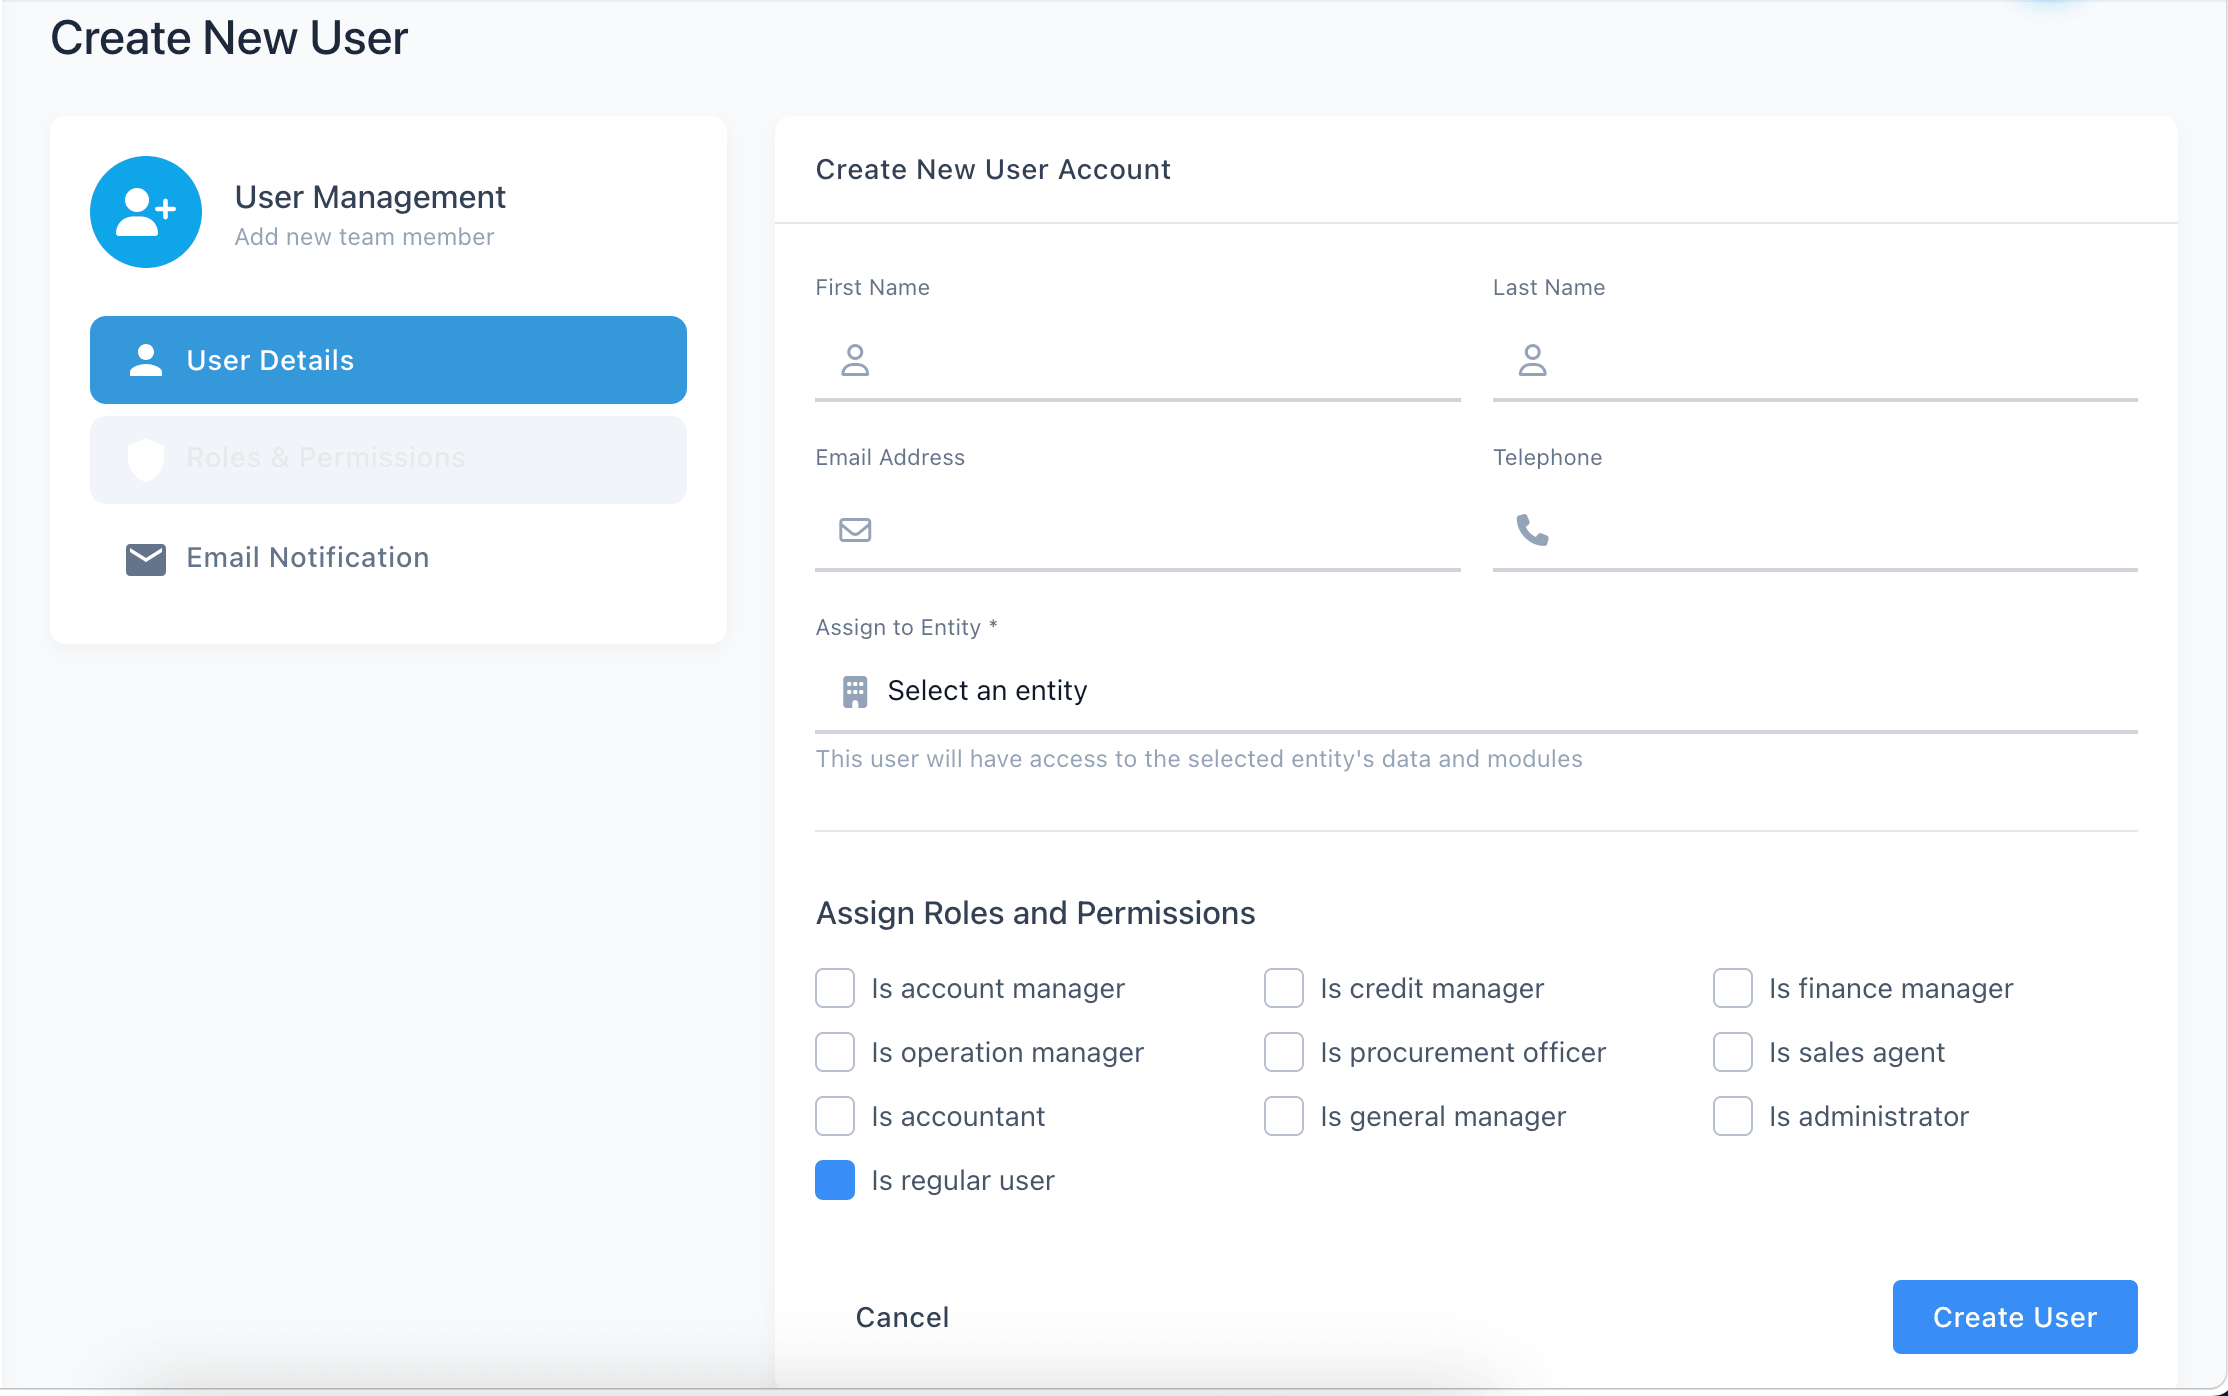
Fill in the form fields:
- First Name: The user's first name.
- Last Name: The user's last name.
- Email Address: The login email. It must be unique across Rexolia.
- Telephone: An optional contact number.
The email cannot already belong to another user. If it does, the form will reject it — use a different address.
3. Assign to an entity
Select the entity this user belongs to from the dropdown (required).
The user will only have access to the selected entity's data and modules. Choose the entity that holds the data they need to work with.
4. Assign roles and permissions
Tick the checkboxes that describe the user's role. Each role grants access to the corresponding modules and functions, e.g. Accountant, Sales Agent, Finance Manager, Administrator, or Regular User.
Select only the roles the user actually needs. An Administrator typically has broad access, so assign it sparingly.
5. Create the user
Review the details, then click Create User.
After creating the user
The user receives a "Welcome onboard" email containing a one-time link to set their password. Until they activate it, the account has no usable password.
- The user's email serves as their assigned username.
- Ask the user to check their inbox (including spam) and follow the link to choose a password before signing in for the first time.
→ For what they see next, and what to do if the link expires, see Set & Reset Your Password.
Onboarding here assumes a business that already has users. For a brand-new business with no users yet, the very first account you create is the business's Administrator — see Onboard the Admin (First User).